官网:https://www.unicorn-engine.org/
无名侠大佬代码
[原创] Unicorn 在 Android 的应用 https://bbs.pediy.com/thread-253868.htm
ida快捷键
g jump address
x jump xref
tab 跳转界面
空格 回到流程界面
安装
1
2
3
4
5
6
7
8
9
10
11
12
13
14
15
16
17
18
19
20
21
22
23
24
25
26
27
28
29
30
31
32
33
34
35
36
37
38
39
40
41
42
43
44
45
46
47
48
49
50
51
52
53
54
55
56
57
58
~ » ipython 127 ↵ tea@teadeMBP Python 3.8 .0 (default , Sep 22 2020 , 15 :19 :24 ) Type 'copyright' , 'credits' or 'license' for more informationIPython 7.19 .0 -- An enhanced Interactive Python . Type '?' for help.In [1 ]: import unicorn In [2 ]: from unicorn import * In [3 ]: from unicorn.arm_const import * 模拟执行的代码 # mov r0, #0x37 ; # sub r1, r2, r3 In [4 ]: ARM_CODE = b"\x37\x00\xa0\xe3\x03\x10\x42\xe0" ...: 架构的类型和模式 In [5 ]: mu = Uc (UC_ARCH_ARM , UC_MODE_ARM ) In [6 ]: mu Out [6 ]: <unicorn.unicorn.Uc at 0x10e682a90 > In [7]: ADDRESS = 0x10000 ...: 取模运算 In [8]: ADDRESS % 0x1000 Out[8]: 0 传入地址和大小 In [9]: mu.mem_map(ADDRESS, 0x1000) 写入代码 In [12]: mu.mem_write(ADDRESS, ARM_CODE) 给寄存器赋值 In [13]: mu.reg_write(UC_ARM_REG_R0, 0x1234) ...: mu.reg_write(UC_ARM_REG_R2, 0x6789) ...: mu.reg_write(UC_ARM_REG_R3, 0x3333) 添加hook代码 In [14]: def hook_code(uc, address, size, user_data): ...: print(">>> Tracing instruction at 0x%x, instruction size = 0x%x" %( ...: address, size)) ...: 添加hook 返回值是hook id In [15]: mu.hook_add(UC_HOOK_CODE,hook_code,None,ADDRESS,ADDRESS+0x100) Out[15]: 140477808707440 开机 trac被执行 2条指令被执行 In [16]: mu.emu_start(ADDRESS,ADDRESS+len(ARM_CODE)) >>> Tracing instruction at 0x10000, instruction size = 0x4 >>> Tracing instruction at 0x10004, instruction size = 0x4 查看执行 In [17]: mu.reg_read(UC_ARM_REG_R0) Out[17]: 55 In [18]: 0x37 Out[18]: 55 In [19]: mu.reg_read(UC_ARM_REG_R1) Out[19]: 13398 In [20]: hex(13398) Out[20]: '0x3456' r1=r2-r3 In [21]: hex(0x6789-0x3333) Out[21]: '0x3456'
第二课
libnative-lib.so
链接: https://pan.baidu.com/s/1rDkZA1Ma5WdLPpiyVPfXNg 密码: 62cl
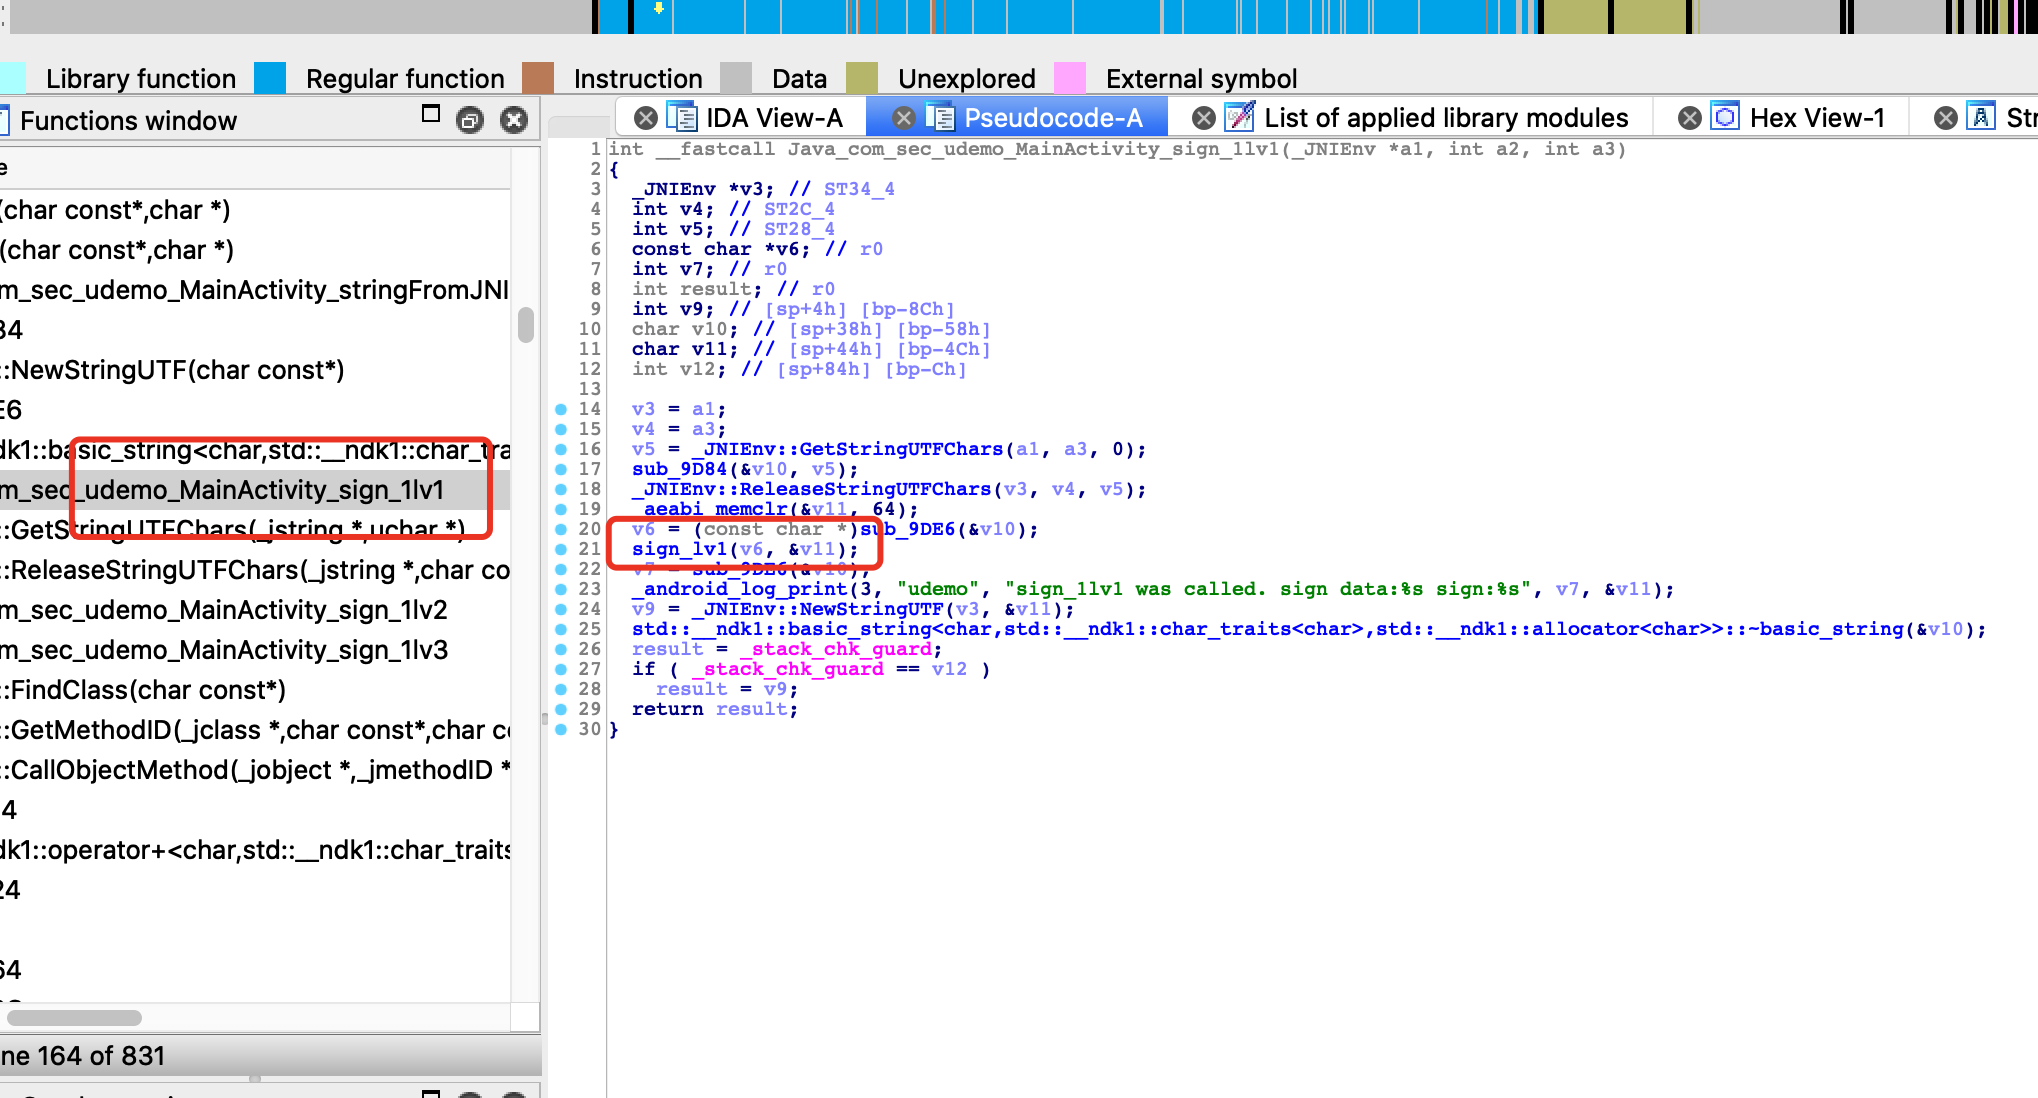
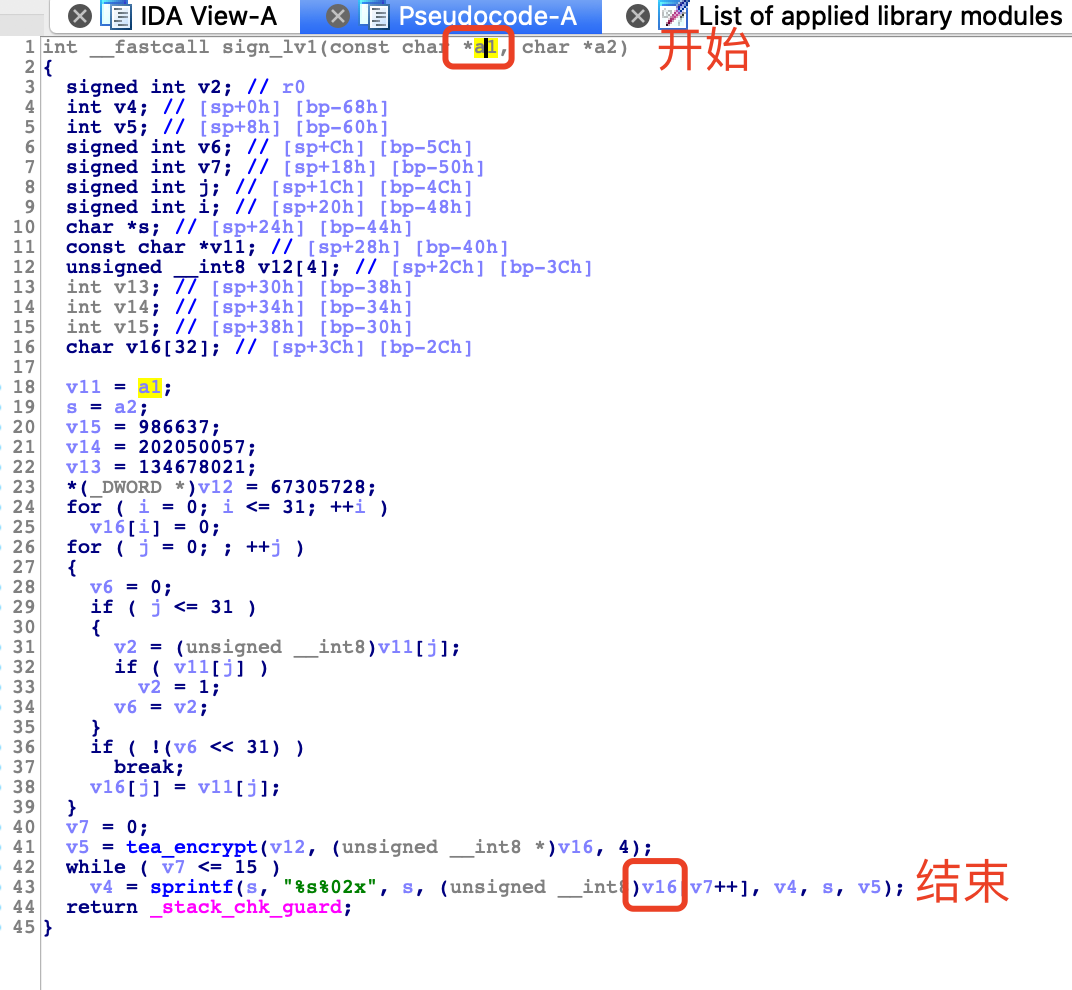
开始位置为加密方法开始的位置
结束位置为
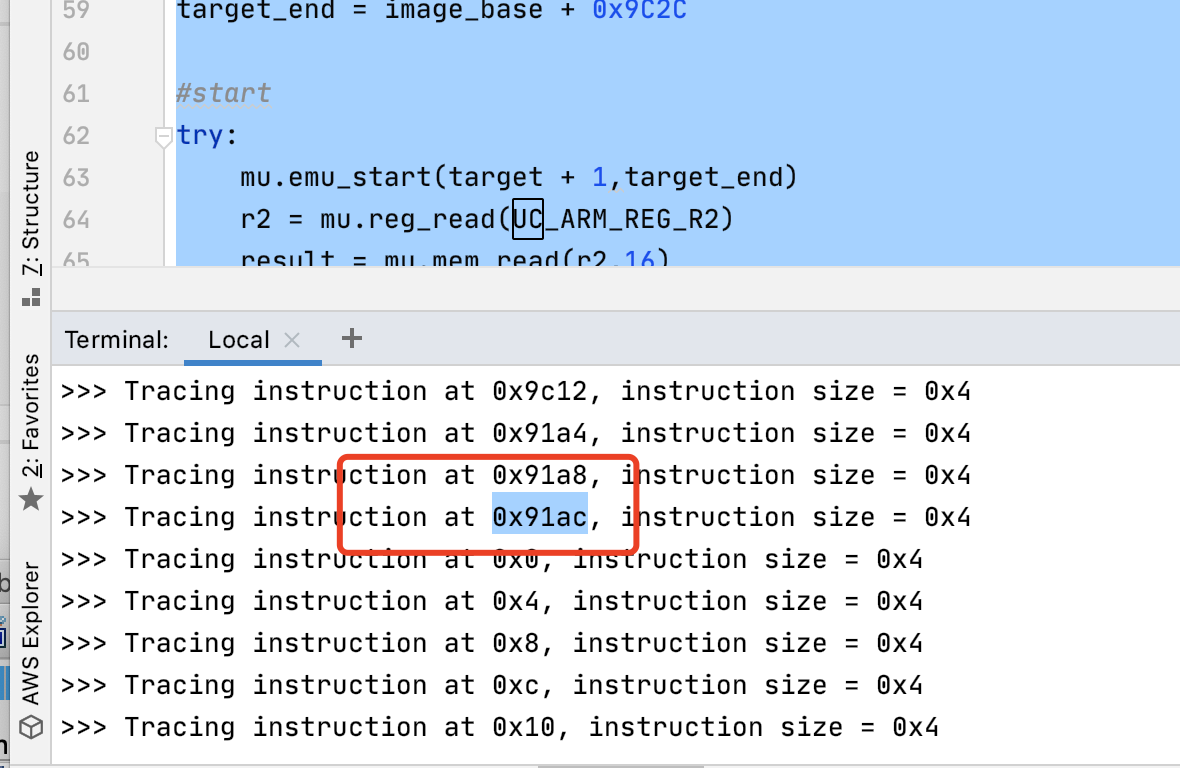
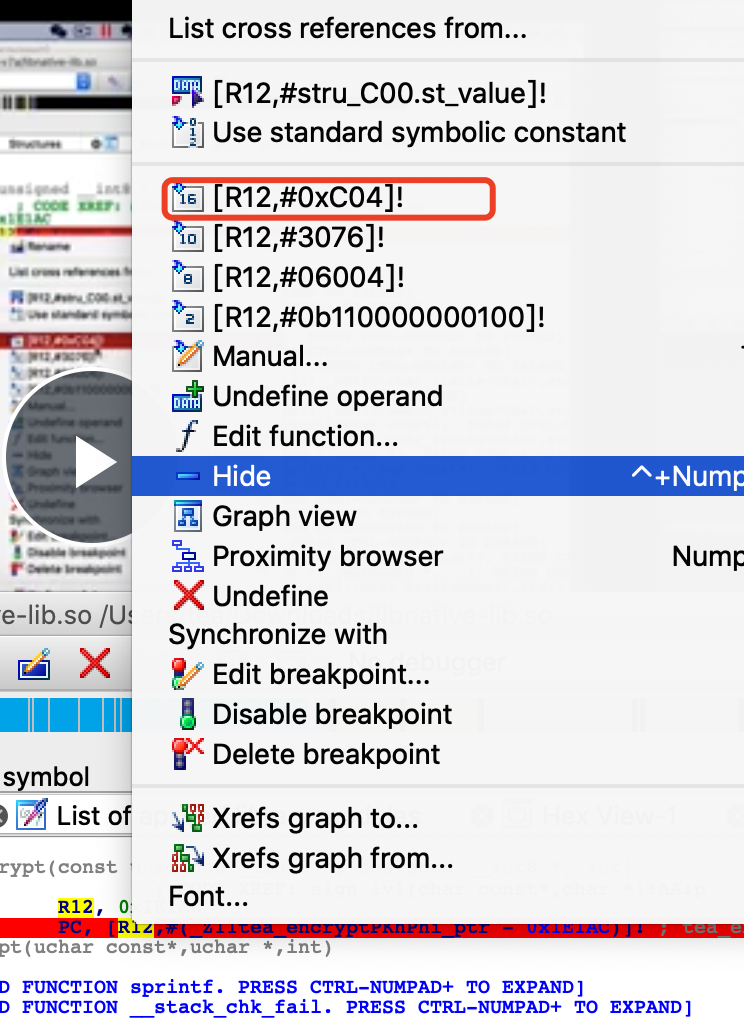
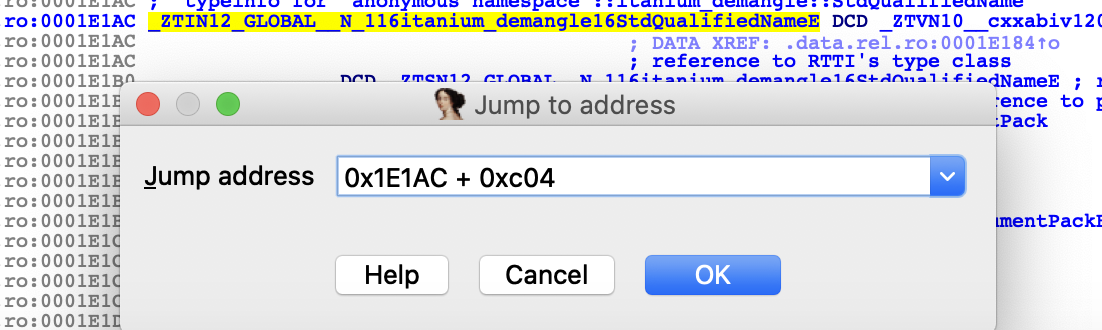
查找0x91ac 有个常量R12
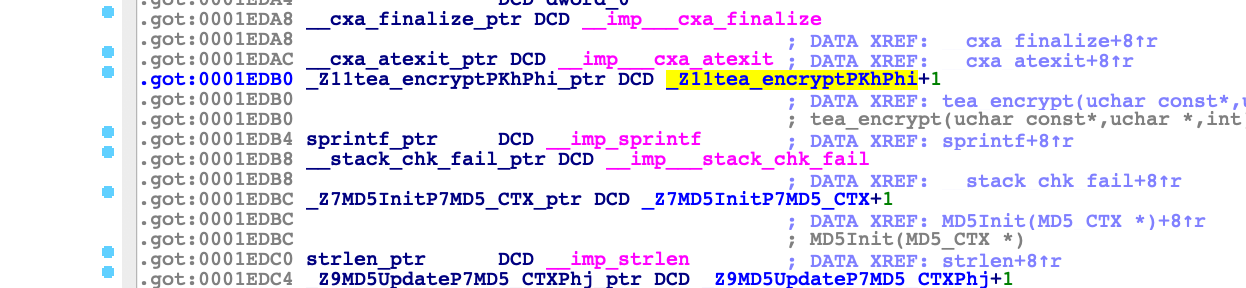
修复表找地址
0x1E1AC + 0xc04
完整代码
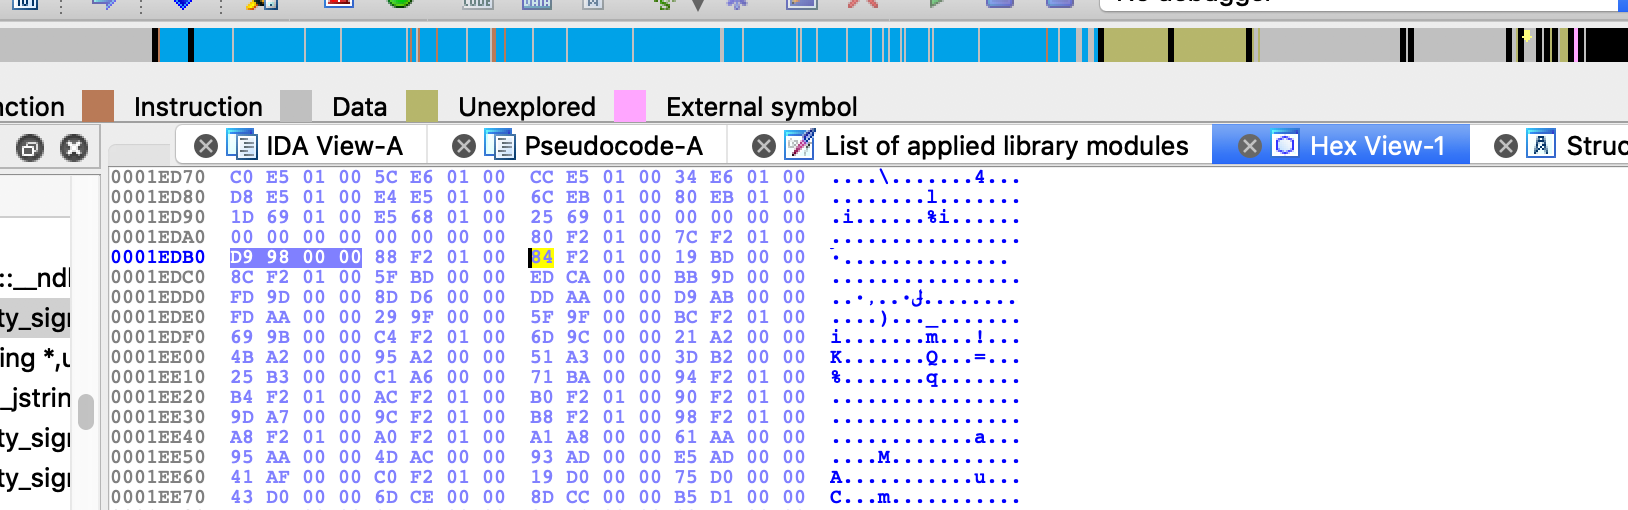
1
2
3
4
5
6
7
8
9
10
11
12
13
14
15
16
17
18
19
20
21
22
23
24
25
26
27
28
29
30
31
32
33
34
35
36
37
38
39
40
41
42
43
44
45
46
47
48
49
50
51
52
53
54
55
56
57
58
59
60
61
62
63
64
65
66
67
68
69
70
71
72
73
from unicorn import * #导入包from unicorn.arm_const import * #导入常量import binascii#设置hook def hook_code (uc,address,size,userdata): print (">>> Tracing instruction at 0x%x, instruction size = 0x%x" % (address,size)) #内存异常的 def hook_memory (uc, access, address, size,value,userdata): # 什么地方异常的 访问地址 pc = uc.reg_read (UC_ARM_REG_PC ) print ("memory error:pc:%x address:%x size:%x" %(pc,address,size)) a1 = b'123' #定义一个虚拟机对象 架构 模式 +2 就是THUMB 指令集 mu = Uc (UC_ARCH_ARM , UC_MODE_THUMB ) #把so加到进程里 #image image_base = 0x0 # 大小8m的镜像 image_size = 0x10000 * 8 #分配 mu.mem_map (image_base,image_size) #载入文件 rb模式载入 binary = open ('libnative-lib.so' ,'rb' ).read () #镜像写到虚拟机内存里面 mu.mem_write (image_base,binary) # 运行函数需要个栈 stack stack_base = 0xa0000 #3m stack_size = 0x10000 * 3 # 栈的指针是向下增长的 减4 个字节 保留添加的位置空余 stack_top = stack_base + stack_size - 0x4 #分配下stackbase mu.mem_map (stack_base,stack_size) #设置下寄存器 reg mu.reg_write (UC_ARM_REG_SP ,stack_top) # data segment #传参数需要数据段 data_base = 0xf0000 data_size = 0x10000 * 3 mu.mem_map (data_base, data_size) # data_base是a1的地址 mu.mem_write (data_base, a1) mu.reg_write (UC_ARM_REG_R0 , data_base) #fix got 修复 mu.mem_write (0x1EDB0 , b'\xD9\x98\x00\x00' ) # set hook mu.hook_add (UC_HOOK_CODE ,hook_code,0 ) mu.hook_add (UC_HOOK_MEM_UNMAPPED ,hook_code,0 ) #函数开始地址 target = image_base + 0x9B68 #函数while 循环 v16地址 循环了16 次 就16 位 target_end = image_base + 0x9C2C #start try : mu.emu_start (target + 1 ,target_end) r2 = mu.reg_read (UC_ARM_REG_R2 ) result = mu.mem_read (r2,16 ) print (binascii.b2a_hex (result)) except UcError as e : print ("tea111" ) print (e) python lesson1.py tea@teadeMacBook-Pro b'304fc35f0a785d7b2ec27b1745725c38'
第三课
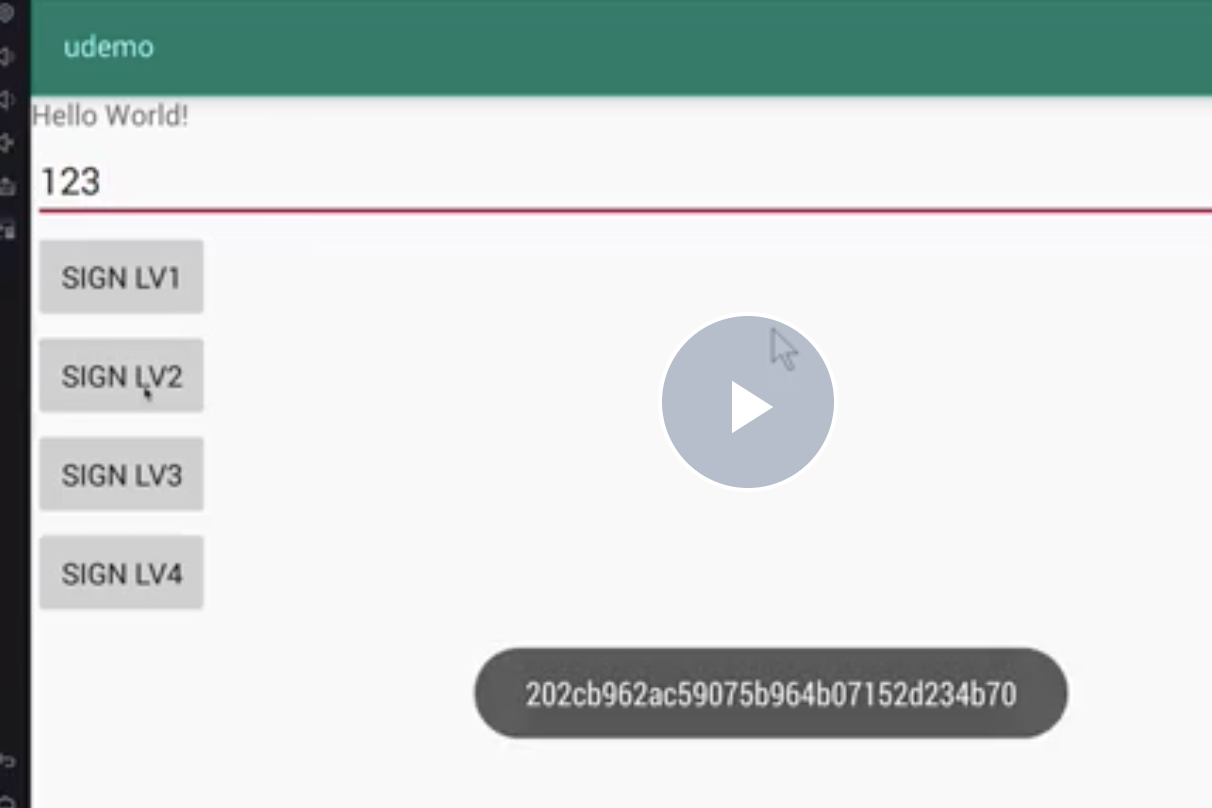
记录签名的结果
载入完整方法
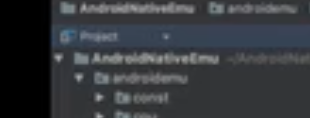
androidemu
https://github.com/Chenyuxin/AndroidNativeEmu
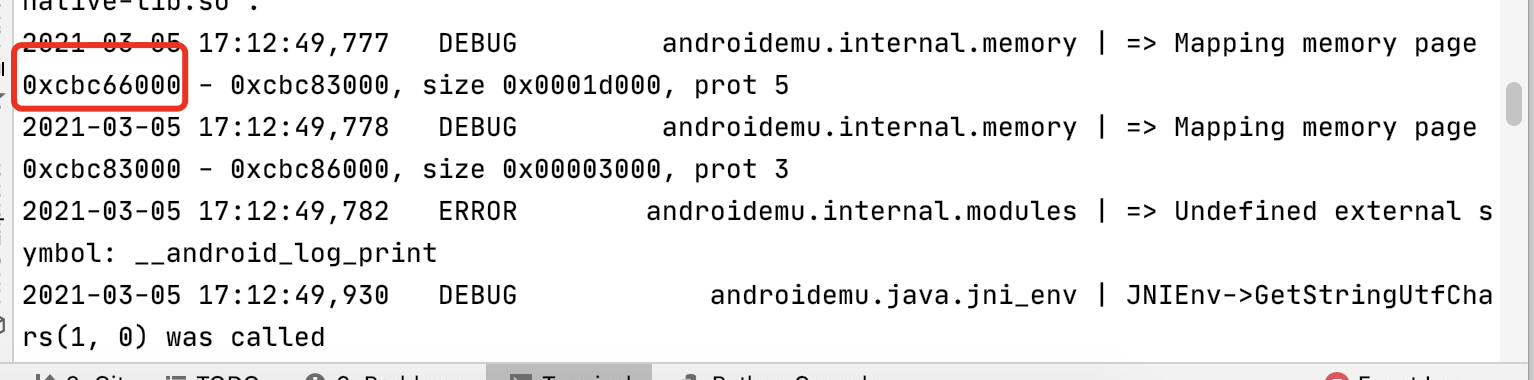
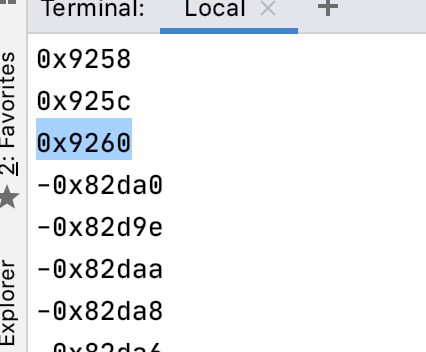
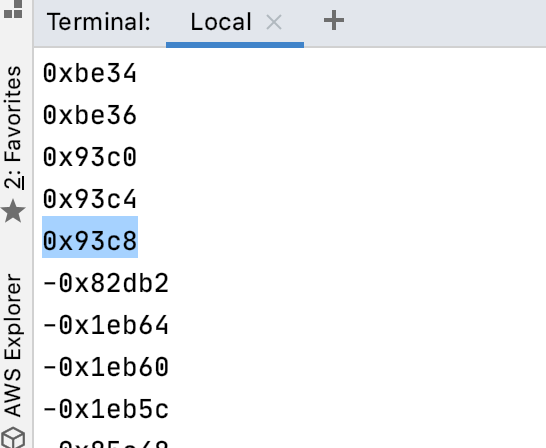
1
2
3
4
5
6
7
8
9
10
11
12
13
14
15
16
17
18
19
20
21
22
23
24
25
26
27
28
29
30
31
32
33
34
35
36
37
38
39
40
41
#导入头文件 from unicorn import * from androidemu.emulator import Emulator from UnicornTraceDebugger import udbg from androidemu.java.helpers.native_method import native_method from androidemu.utils import memory_helpers import logging import sys #日志 输出调试信息 logging.basicConfig(stream=sys.stdout, level=logging.DEBUG, format="%(asctime)s %(levelname)7s %(name)34s | %(message)s") logger = logging.getLogger(__name__) #创建模拟器对象 emulator = Emulator() #got hook #emulator.modules.add_symbol_hook('__aeabi_memclr',emulator.hooker.write_function(__aeabi_memclr)+1) #emulator.modules.add_symbol_hook('__aeabi_memcpy',emulator.hooker.write_function(__aeabi_memcpy)+1) #emulator.modules.add_symbol_hook('sprintf',emulator.hooker.write_function(sprintf)+1) #加载so的依赖项 do_init so中自加密中使用自解密 字符串加密 emulator.load_library('lib/libc.so',do_init=False) libmod = emulator.load_library('lib/libnative-lib.so',do_init=False) try: #调试工具 dbg = udbg.UnicornDebugger(emulator.mu) #导入函数123会自动转换 s = emulator.call_symbol(libmod, 'Java_com_sec_udemo_MainActivity_sign_1lv2', emulator.java_vm.jni_env.address_ptr, 0, "123") print(s) except UcError as e: #打印执行流 list_tracks = dbg.get_tracks() #打印最后的100项 for addr in list_tracks[-100:-1]: #实际地址减去模块的加载地址 print(hex(addr - 0xcbc66000)) print (e)
找到lib/libnative-lib.so
0x9260
最后一个正数
emulator.modules.add_symbol_hook(‘__aeabi_memclr’, emulator.hooker.write_function(__aeabi_memclr) + 1)
加上这句代码
def __aeabi_memclr(mu,addr,size):
print(‘__aeabi_memclr(%x,%d)’ % (addr, size))
mu.mem_write(addr, bytes(size))
导入库
from androidemu.java.helpers.native_method import native_method
函数加载有问题 就要hook库函数自己实现
emulator.modules.add_symbol_hook(‘__aeabi_memcpy’ ,emulator.hooker.write_function(__aeabi_memcpy)+1)
emulator.modules.add_symbol_hook(‘sprintf’ ,emulator.hooker.write_function(sprintf)+1)
使用课程带的androidemu后就运行可以了
完整代码
1 2 3 4 5 6 7 8 9 10 11 12 13 14 15 16 17 18 19 20 21 22 23 24 25 26 27 28 29 30 31 32 33 34 35 36 37 38 39 40 41 42 43 44 45 46 47 48 49 50 51 52 53 54 55 56 57 58 59 60 61 62 63 64 65 from unicorn import *from androidemu.emulator import Emulatorfrom UnicornTraceDebugger import udbgfrom androidemu.java.helpers.native_method import native_methodfrom androidemu.utils import memory_helpersimport loggingimport syslogging.basicConfig(stream=sys.stdout, level=logging.DEBUG, format ="%(asctime)s %(levelname)7s %(name)34s | %(message)s" ) logger = logging.getLogger(__name__) @native_method def __aeabi_memclr (mu,addr,size ): print ('__aeabi_memclr(%x,%d)' % (addr, size)) mu.mem_write(addr, bytes (size)) @native_method def __aeabi_memcpy (mu, dist, source, size ): print ('__aeabi_memcpy(%x,%x,%d)' % (dist, source, size)) data = mu.mem_read(source, size) mu.mem_write(dist, bytes (data)) @native_method def sprintf (mu, buffer, format1, a1, a2 ): format1 = memory_helpers.read_utf8(mu, format1) result = format1 % (memory_helpers.read_utf8(mu, a1), a2) mu.mem_write(buffer, bytes ((result + '\x00' ).encode('utf-8' ))) emulator = Emulator() emulator.modules.add_symbol_hook('__aeabi_memclr' ,emulator.hooker.write_function(__aeabi_memclr)+1 ) emulator.modules.add_symbol_hook('__aeabi_memcpy' ,emulator.hooker.write_function(__aeabi_memcpy)+1 ) emulator.modules.add_symbol_hook('sprintf' ,emulator.hooker.write_function(sprintf)+1 ) emulator.load_library('lib/libc.so' ,do_init=False ) libmod = emulator.load_library('lib/libnative-lib.so' ,do_init=False ) try : dbg = udbg.UnicornDebugger(emulator.mu) s = emulator.call_symbol(libmod, 'Java_com_sec_udemo_MainActivity_sign_1lv2' , emulator.java_vm.jni_env.address_ptr, 0 , "123" ) print (s) except UcError as e: list_tracks = dbg.get_tracks() for addr in list_tracks[-100 :-1 ]: print (hex (addr - 0xcbc66000 )) print (e)
Author:
tea9
Permalink:
http://tea9.xyz/post/523094393.html
License:
Copyright (c) 2017-2023 CC-BY-NC-4.0 LICENSE
Slogan:
Do you believe in DESTINY ?